Smart Spend > Set up your Legal Entity
Setting up a Legal Entity
When you complete the Hilton onboarding form, you will be prompted to complete a legal entity setup. Alternatively, you can setup the legal entity under the Setup tab.

01
From Business Profile Tab
- Click on Legal Entites
- Next Click on Create in the top left hand corner right under LEGEL ENTITES

Create Legal Entity
02
- Enter the Legal Entity Name and Country
- Invoice from Address – this address is the physical address that you receive mail.
- Ship From Address – the same as invoice from address is selected by default. If ship from address is different, please uncheck and enter address.
- Remit-To - – the same as invoice from address is selected by default. If ship from address is different, please uncheck and enter address.
- This is the address where you expect check payments to be received.
- Click Save. The following prompt will appear. Click continue and you will be directed to the Payment Methods Page


Setting up Payment Method (Banking Information)
03
- Click on Add Payment Methods
- From Drop Down select Bank Transfer
- Select the Associated Entity (if you have more than one)
- Add your banking details then click save
- You will then be prompted to check which customer you want to share with. Then Click Save

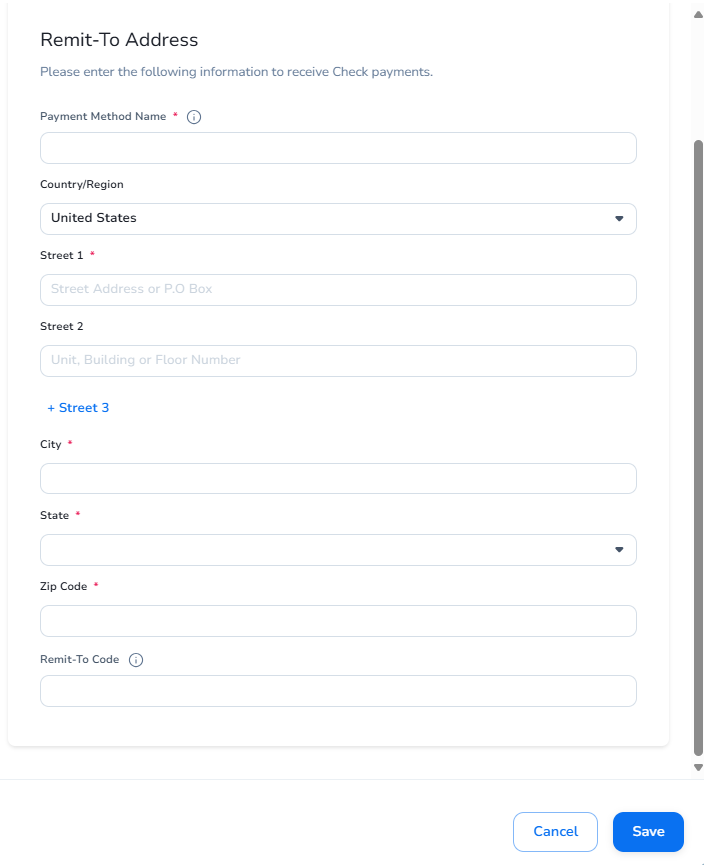
Setting Payment Method Remit-To Address
04
- Click on Add Payment Methods
- From Drop Down select Remit-To
- Select the Associated Entity (if you have more than one)
- Add your Remit-To Address, then click Save
- You will then be prompted to check which customer you want to share with. Then Click Save

05
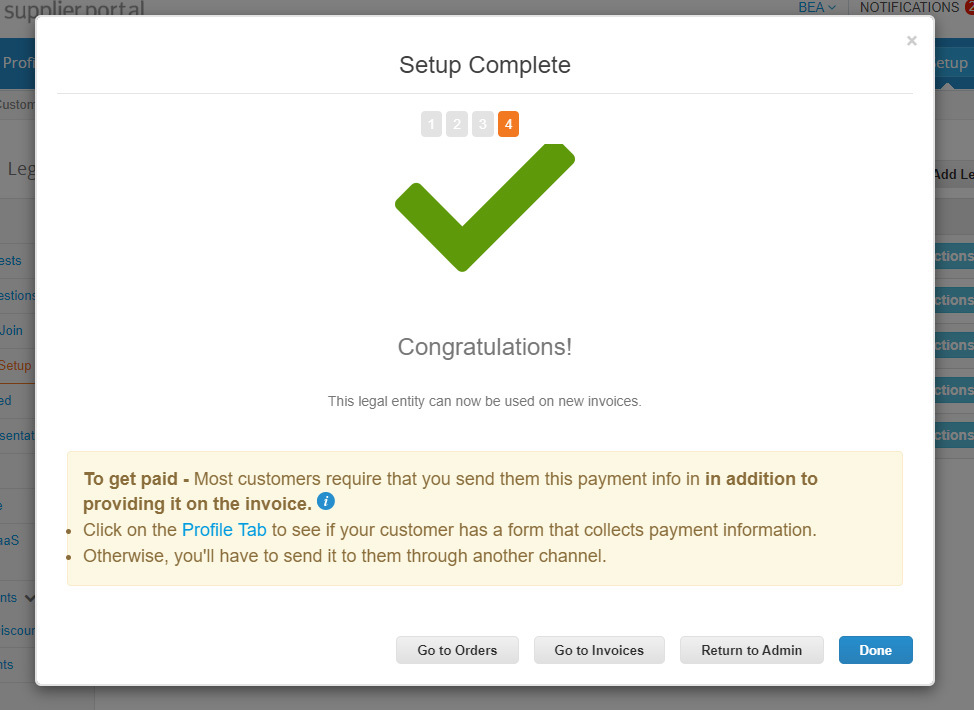
Setup Complete
This legal entity can now be used on new invoices.


